Save All Selections In Current Table
Introduction
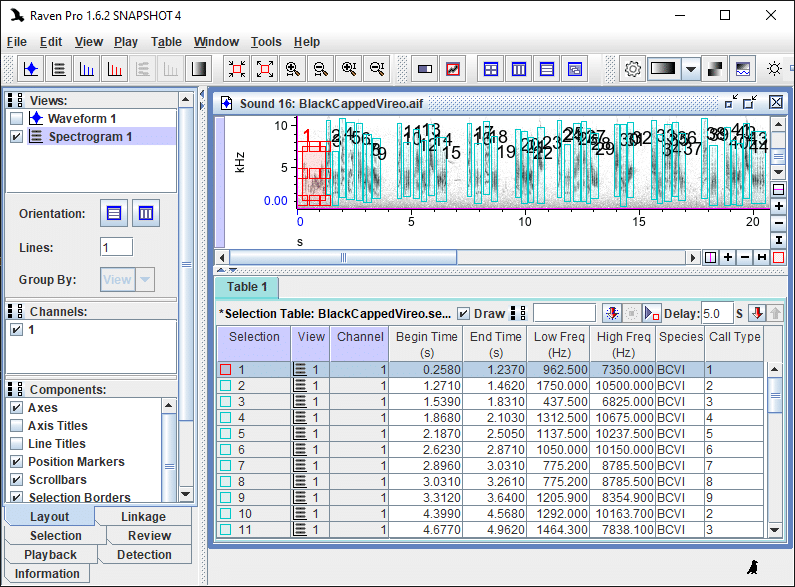
One of the most powerful way of making sound clips in Raven is to save all the selection in your current selection table as sound clips, that is, small sound files, one for each of the selections in your selection table. This article will discuss how to accomplish this, including options for naming the exported sound files.
Caveat
This article assumes that your computer’s system locale is set to English (United States). If you live in another part of the world, Excel may change the number and date formats in selection tables, rendering them unusable in Raven. The Begin Time and End Time columns must have values formatted like 43245.234 or the selection will no longer be compatible with Raven.
Discussion
To export selections in a selection table as sound clips:
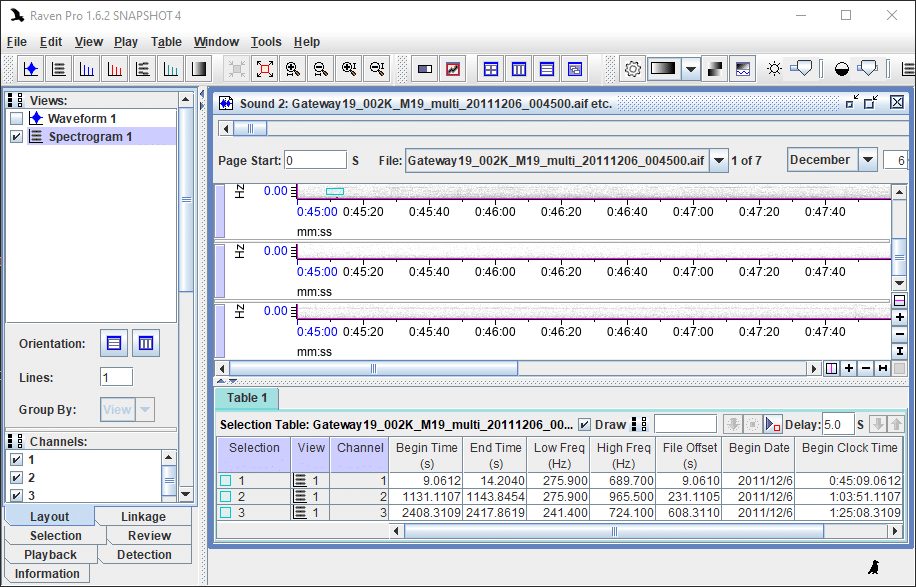
- Open a selection table in a sound window in Raven.
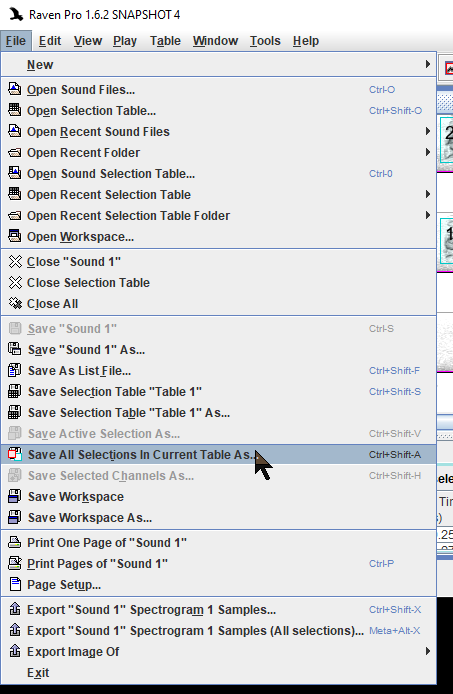
- Select “Save All Selections in Current Table As” from the File menu.
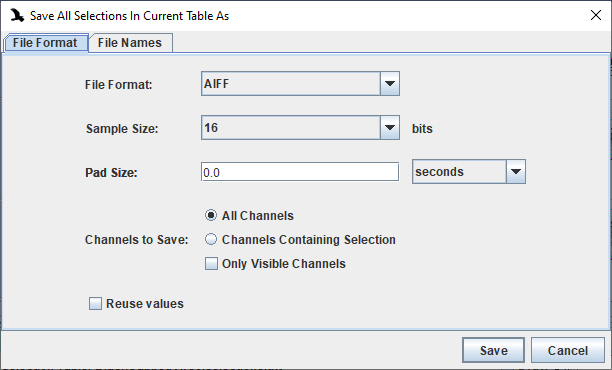
- Select the desired settings in the “File Format” tab.
- Tips
- Sample Size: Generally you will want to use the same sample size as the sound that is open in Raven. Sample size is sometimes referred to as bit depth.
- Pad Size: Settings great than zero cause Raven to increase the length of each clip such that it includes some of the recording outside the selection.
- Tips
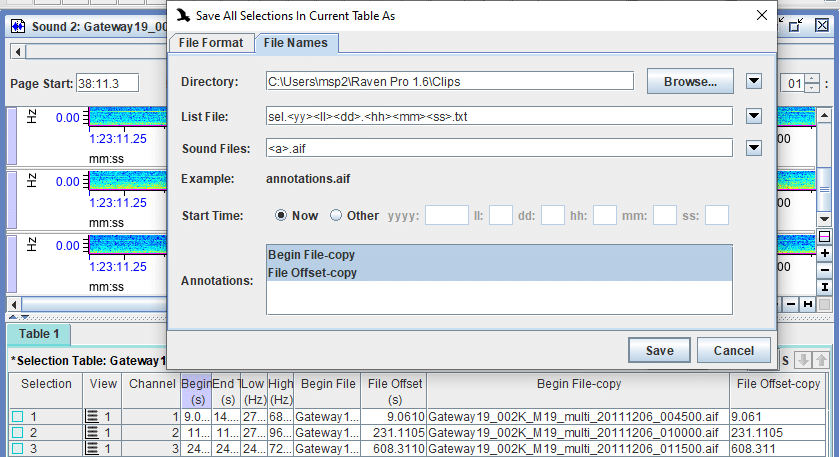
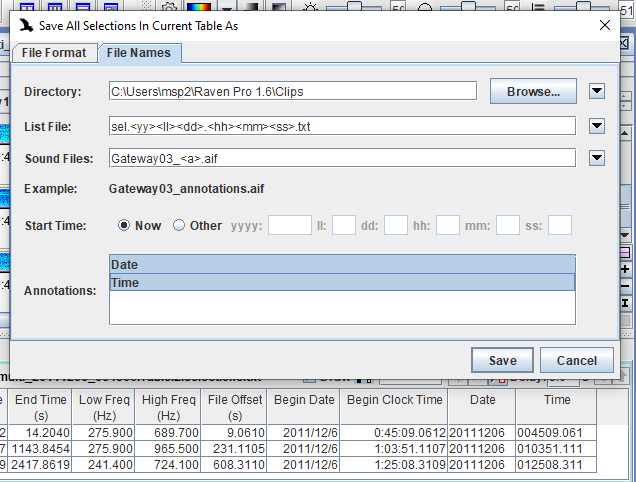
- Select the desired settings in the “File Names” tab.
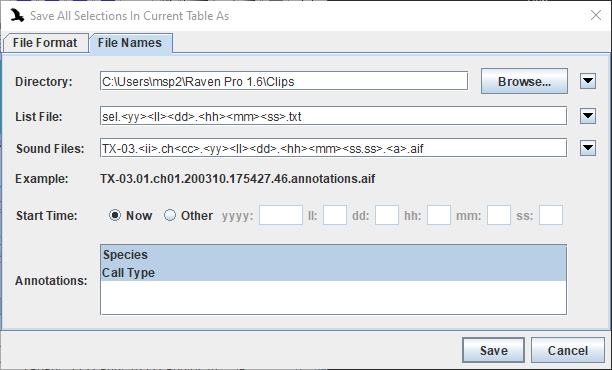 Text in the “Sound Files” fields will appear in the file names of the clips, excepting text enclosed by “<” and “>”, which will be replaced by the relevant value when the clips are created. For example, “sel.<ii>.ch<cc>.<yy><ll><dd>.<hh><mm><ss.ss>.<a>.aif” might be converted to “sel.01.ch01.200310.161530.44.TuAm.call.aif”. Here is a key to character subsitutions:
- <ii> = clip index (the clips are assigned consecutive numbers starting with “1”.
- <C> = text name of the channel.
- <cc> = channel.
- <yy> = year in which clips are being exported.
- <ll> = month in which clips are being exported.
- <dd> = day in which clips are being exported.
- <hh> = hour in which clips are being exported.
- <mm> = month in which clips are being exported.
- <ss.ss> = seconds in which clips are being exported.
- <a> = annotation. Note that you must select one or more of the annotations in the “Annotations” field in order for annotations to appear in the file names.
- When you click on the “Save” button, selections in your selection table will be exported as sound clips with names like:
- TX-03.01.ch01.200310.180025.06.BCVI.1.aif
- TX-03.02.ch01.200310.180026.07.BCVI.2.aif
- TX-03.03.ch01.200310.180026.34.BCVI.3.aif
- TX-03.04.ch01.200310.180026.67.BCVI.4.aif
- TX-03.05.ch01.200310.180026.99.BCVI.5.aif
- TX-03.06.ch01.200310.180027.43.BCVI.6.aif
- TX-03.07.ch01.200310.180027.70.BCVI.7.aif
- TX-03.08.ch01.200310.180027.83.BCVI.8.aif
- TX-03.09.ch01.200310.180028.12.BCVI.9.aif
- TX-03.10.ch01.200310.180029.20.BCVI.2.aif
- TX-03.11.ch01.200310.180029.48.BCVI.3.aif
How to Name Sound Clips Using Sound Name and File Offset
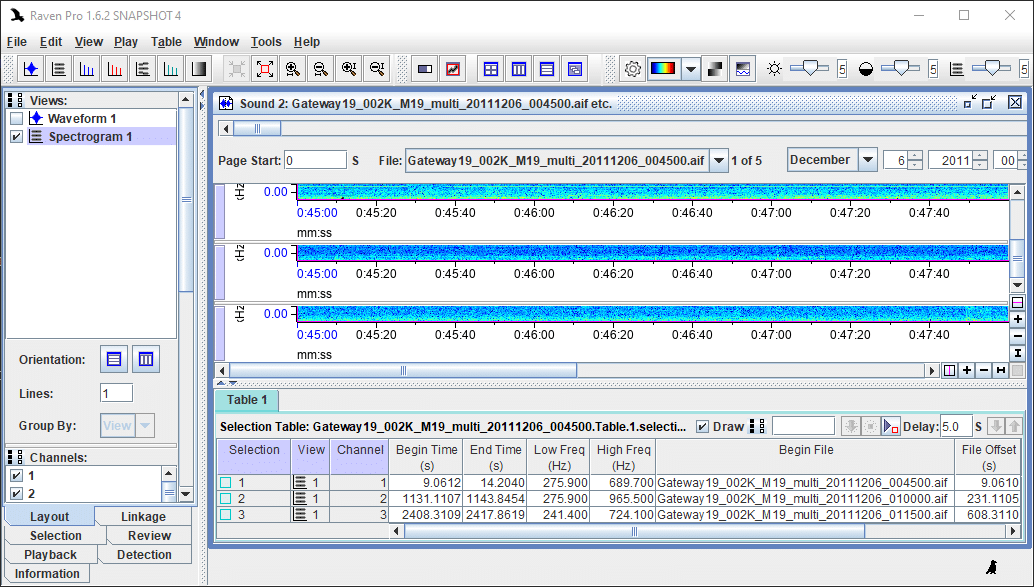
- Add to your selection table the “Begin File” and “File Offset” measurements.
- Save and close the selection table in Raven.
- Open the selection table in Excel or another spreadsheet application.
- Copy the “Begin File” and “File Offset (s)” columns and paste them to the first blank columns. In the new columns, replace “Begin File” with “Begin File (copy)” and “File Offset (s)” with “File Offset (copy)”.

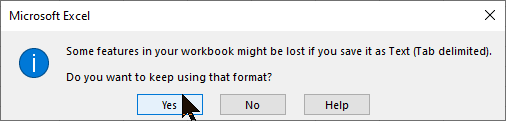
- Save, making sure to keep the same format. Close.
- Open the edited selection table in Raven.
- In the File menu, select “Save All Selections in Current Tab”.
- In the “File Names” tab, type “<a>.wav” or “<a>.aif”, depending on whether you selected “WAVE” or “AIFF” in the “File Format” field in “File Format” tab.
- When you click on the “Save” button, selections in your selection table will be exported as sound clips with names like:
- Gateway19_002K_M19_multi_20111206_004500.aif.9.061.aif
- Gateway19_002K_M19_multi_20111206_010000.aif.231.1105.aif
- Gateway19_002K_M19_multi_20111206_011500.aif.608.311.aif
How to Name Sound Clips Using the Date and Time of Recording
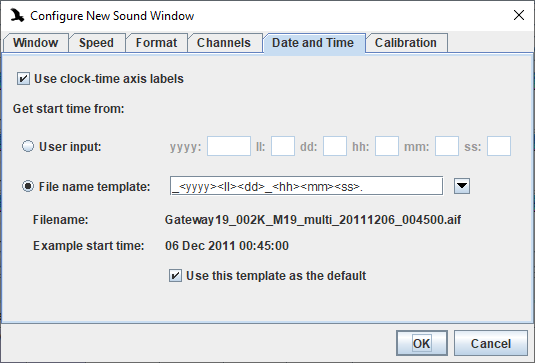
- Open your sound files in Raven, setting up the Real Clock Time feature in Raven.
- Add the “Begin Date” and “Begin Clock Time” measurements to your selection table and save it.
- Open your selection table in Excel or some other text editing application and copy the “Begin Date Time” column into an new column. In the first row of the new column, change “Begin Date Time” to “Date”.

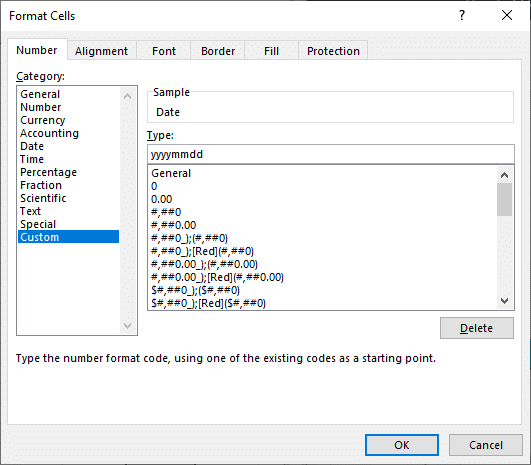
- Select the “Date” column. Right-click and select “Format Cells”. Select “Custom” in the Category panel. Enter “yyyymmdd” in the “Type” field. Click the OK button.
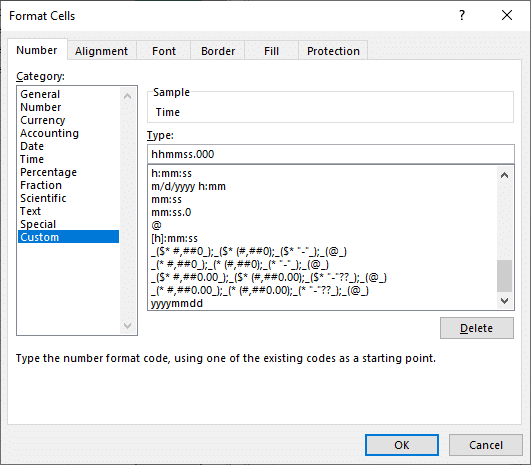
- Select the “Time” column. Right-click and select “Format Cells”. Select “Custom” in the Category panel. Enter “hhmmss” in the “Type” field. Click the OK button.
- Save the selection table. Click the “Yes” button to keep the same format. Close the selection table.
- Open your edited selection table in Raven.
- In the File menu, select “Save All Selections In Current Table As”, making sure to select the name of the new annotation column in the “Annotations” field.
- When you click on the “Save” button, selections in your selection table will be exported as sound clips with names like:
- Gateway03_20111206.004509.061.aif
- Gateway03_20111206.010351.111.aif
- Gateway03_20111206.012508.311.aif
Known Bugs
<ff> should be the file name, but it is blank. There is a constructor for passing it in, but it is not used when exporting clips.
<tt> should be the table number, but it is always 1.
<kk> should the total number of selections being exported, but it is always 1. There is a constructor for passing it in, but it is not used when exporting clips.