Machine Learning Detector – Quick Start Guide
Introduction
Raven’s new Learning Detector uses TensorFlow machine learning technology to automatically detect and classify sounds. At present the Learning Detector includes BirdNET v2.2, which can detect and classify the sounds of more than 3,000 bird species, as well as machine learning models for the blue whale, North Atlantic Right Whale, and Panamanian katydids. You can also train your own TensorFlow-based machine learning models using applications like BirdNET- Analyzer and Koogu and then integrate them into the Machine Learning Detector.
| Tip #1: We recommend that you Add BirdNET V2.4 to Raven Pro, since it has better accuracy and can detect twice as many avian species (more than 6,000!) than BirdNET V2.2, the version installed by the Raven Pro 1.6.5 installer. |
| Tip #2: The Machine Learning Detector runs on Macs with Intel CPUs, but it cannot run on Macs with Apple Silicon (that is, the M1 and M2 chips). This is related to Raven’s dependency on TensorFlow Java. BirdNET-Analyzer, a free application that is fully compatible with Apple Silicon, also features BirdNET V2.4 and outputs selection tables that can be reviewed in Raven. See these Apple-specific installation instructions. If you aren’t already a Python user, you may find these more detailed installation instructions helpful. |
Quick Start Guide
- Detection Modes: The learning detector can be invoked in four modes (details in Chapter 10 of the Raven Pro User’s Manual):
- Full Detection Mode
- Runs detector on all sound files in active sound window and saves detector output for all sound files into a single selection table. You can open a virtually unlimited number of sound files into a single sound window by using paged sound views, as demonstrated in the Raven Video Tutorials 06 and 07 and described in the Raven Pro User’s Manual Chapter 7, which you can open from the Help menu in Raven Pro. In general, the best practice is to open all project sound files for a given recording site into a single sound window. If you have recorded audio at more than one site, consider opening the sound files for each site in a separate paged sound window to avoid the confusion of having several timelines open in the same sound window. Usually the preferred detection mode. (For more details, see Best Practices for Data Management.)
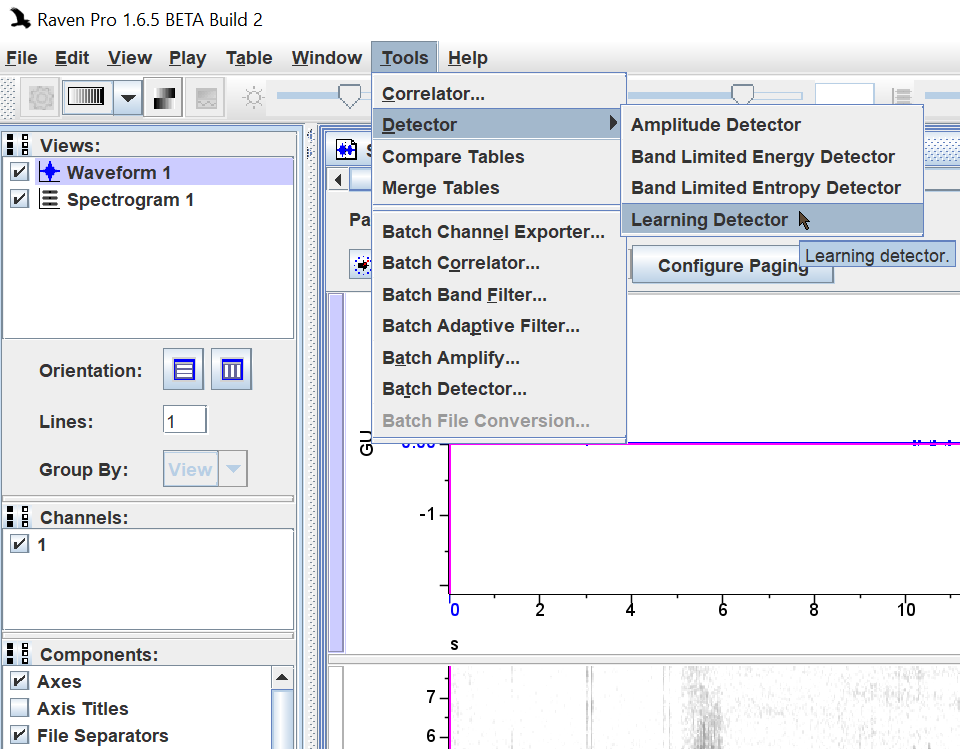
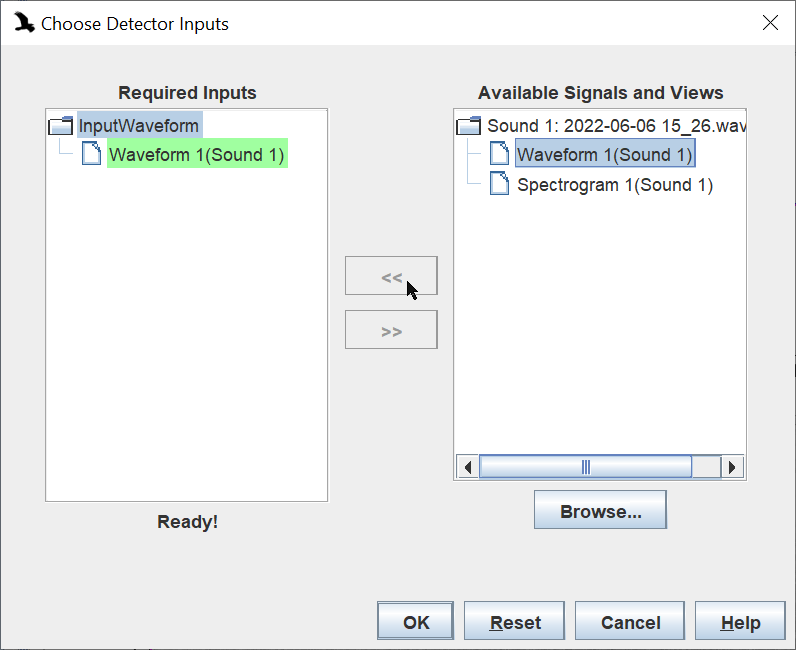
- Select Learning Detector using the Tools menu. Select waveform view as input.
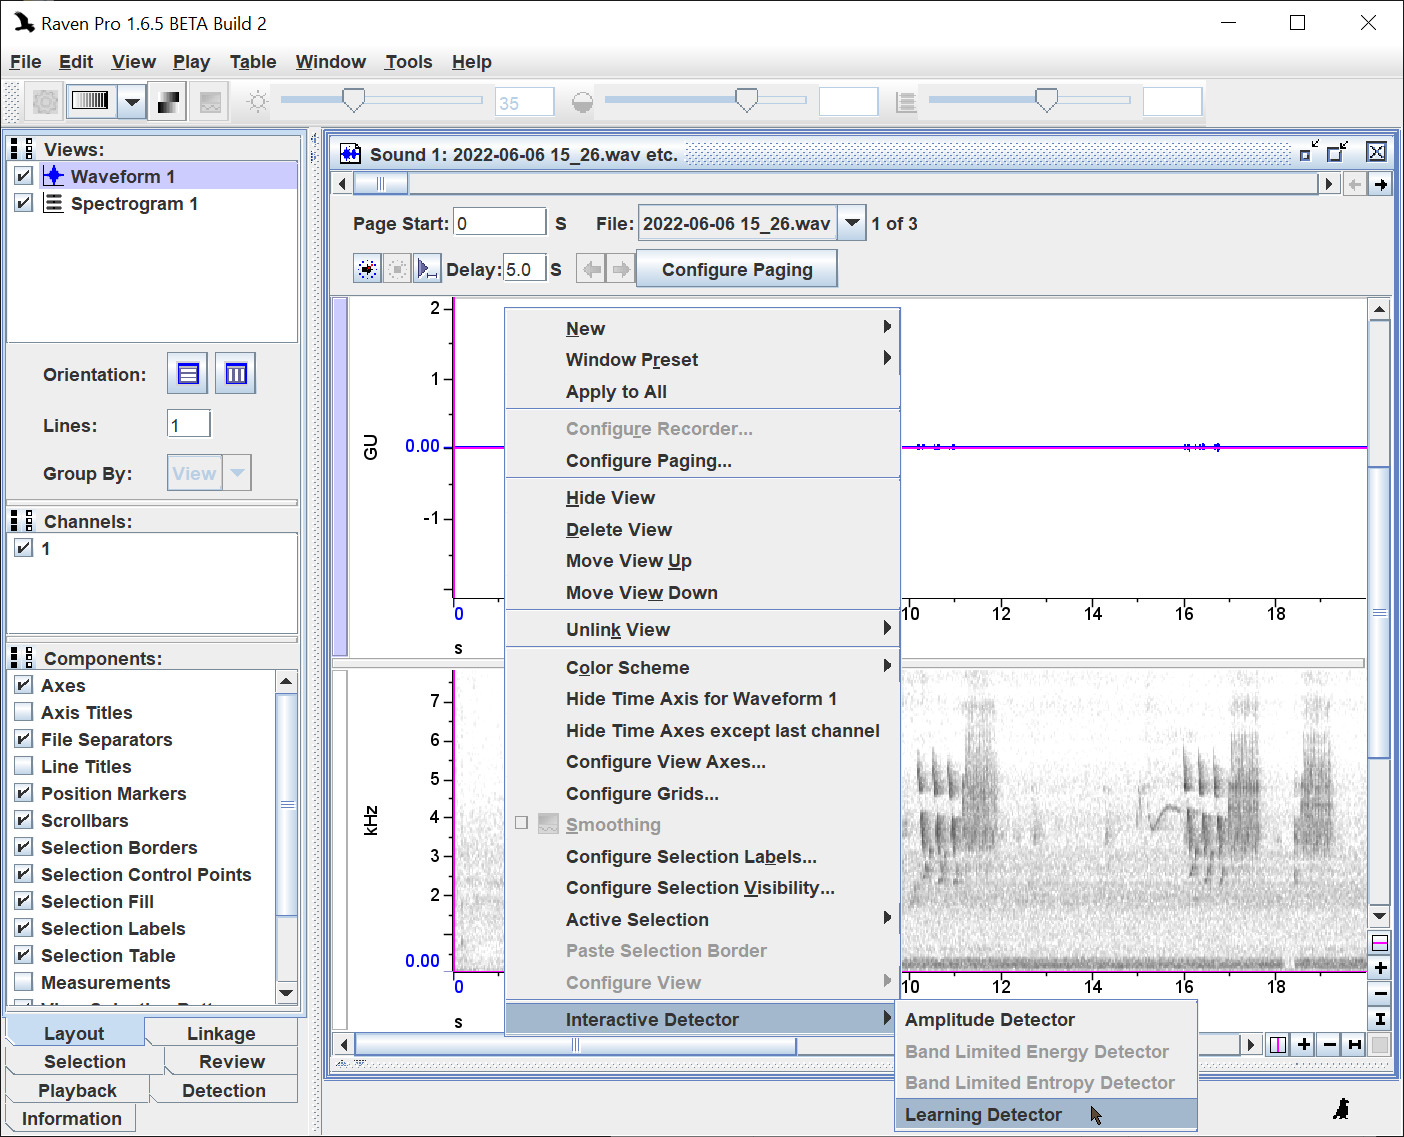
- Interactive Detection Mode
- Runs detector on current page only. Useful when testing detector settings.
- Set up by clicking on waveform axis label to activate waveform view. Select Learning Detector using View menu.
- Batch Detection Mode
- Batch mode appears not to work well with the Machine Learning Detector and is not recommended.
- Real-time Detection Mode
- Does not work for the Machine Learning Detector.
- Full Detection Mode
- Inputs tab
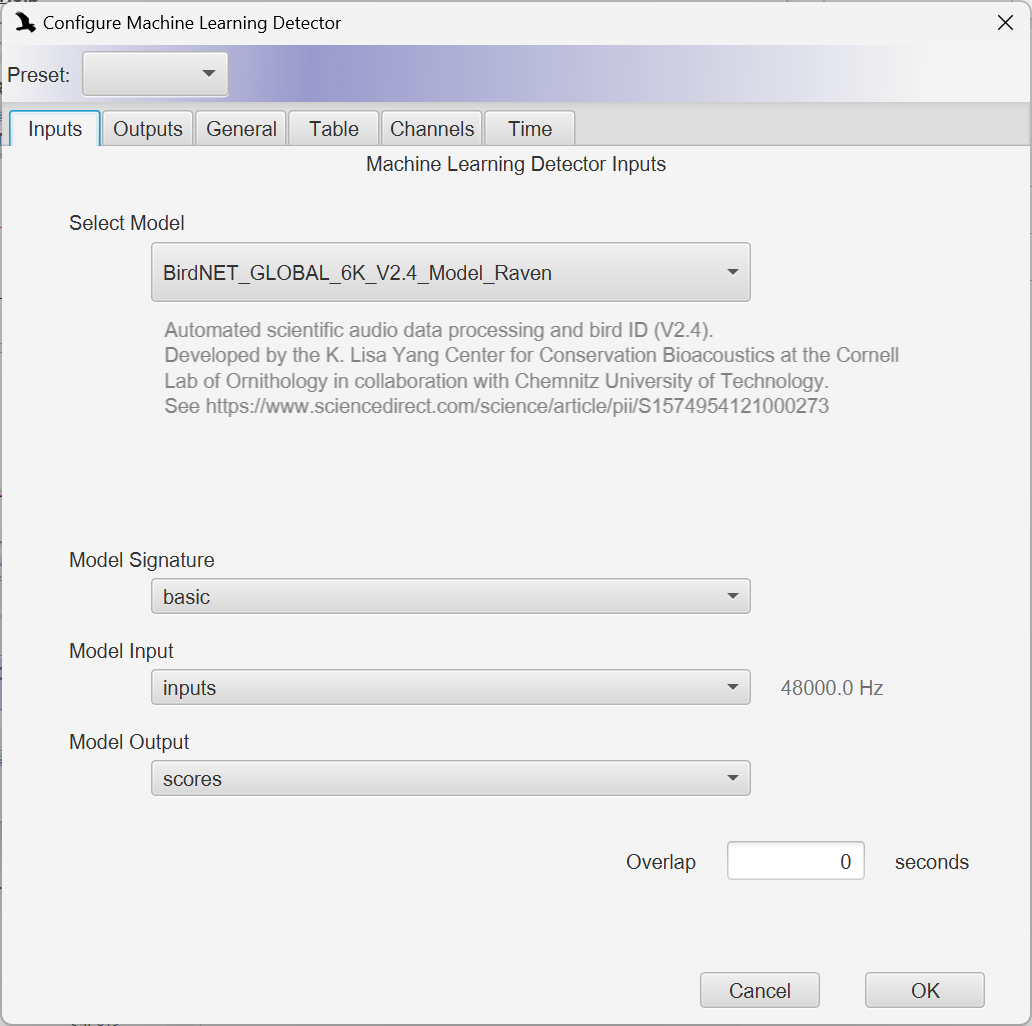
- Select Model: Click on current model and select desired model from list.
- Model Signature: (only one choice for current models)
- Model Input: (only one choice for current models)
- Model Output: (only one choice for current models)
- Overlap: The Learning Detector operates on 3-second-long chunks of your recording. Overlapping chunks may act to prevent the detector’s missing sound events that fall on the boundaries between chunks, but could result in some sound event being detected twice.
- Outputs tab
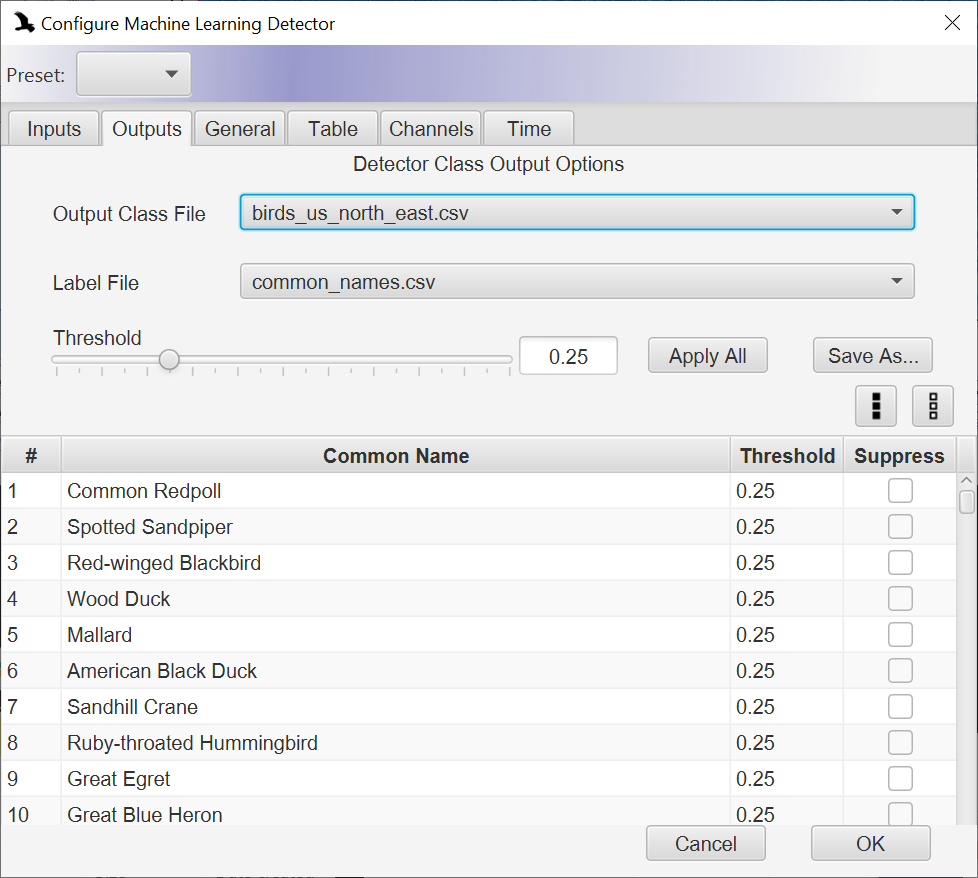
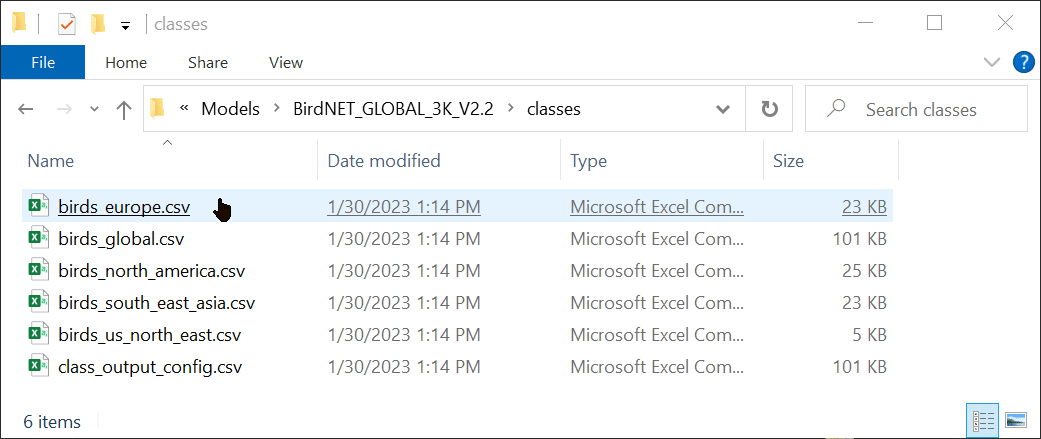
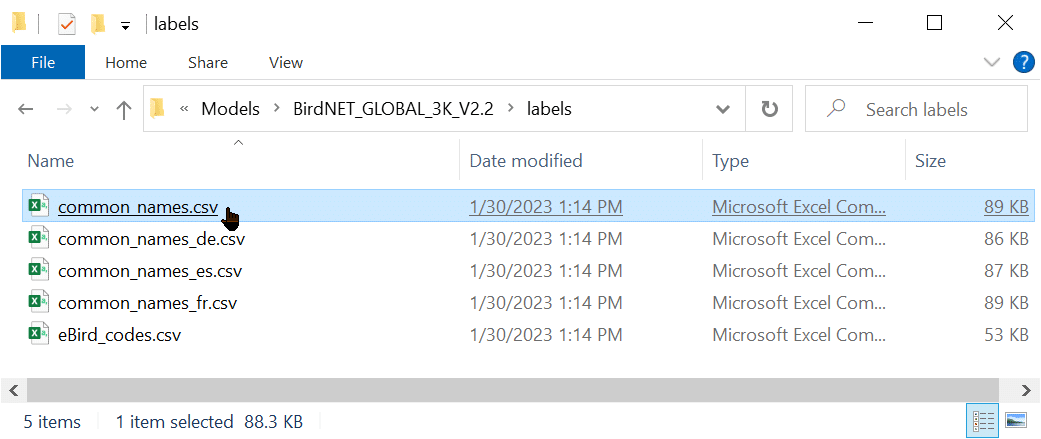
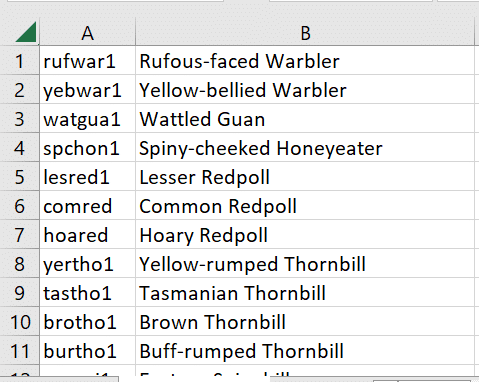
- Output Class File: Limits output classes (typically species or call types) to those listed in the selected comma-separated value (csv) text file, which you can find in the Models folder in Raven’s user data folder. Output class files can be edited in a text editor or in a spreadsheet application like Excel.

- Column A lists the code for each output class.
- Column B sets the threshold for each output class.
- Column C sets the Low Freq of the output selections for each output class.
- Column D sets the High Freq of the output selections for each output class.
- Column E sets whether output for each class is suppressed.
- Threshold and suppression are discussed in more detail below.
- Label File: The selected csv file specifies how each output class is labelled in output selection tables. Label files are comma-separated value (csv) text files, which you can find in the Models folder in Raven’s user data folder.
- Threshold: Specifies a threshold to be applied to “Confidence” values, which range from 0 to 1, high confidence values corresponding with output selections with the greatest likelihood of marking the sound that the detector was designed to find. Raising the threshold will likely reduce the number of selections in the output selection table, but may increase the proportion of selections in the output that represent what you are trying to detect. After changing the threshold you must click the “Apply All” button for the threshold to be applied to all output classes. If you want to save the threshold to an output class file, click the “Save As” button. Note that you can set separate thresholds for each species by editing column B for its output class lines in the output class file. using a text editor or spreadsheet application like Excel.
- Suppression: Enabling the “Suppress” box for one of the output classes will prevent selections from that output class from appearing. Note that you can also set class suppressions by editing column E in the output class file.
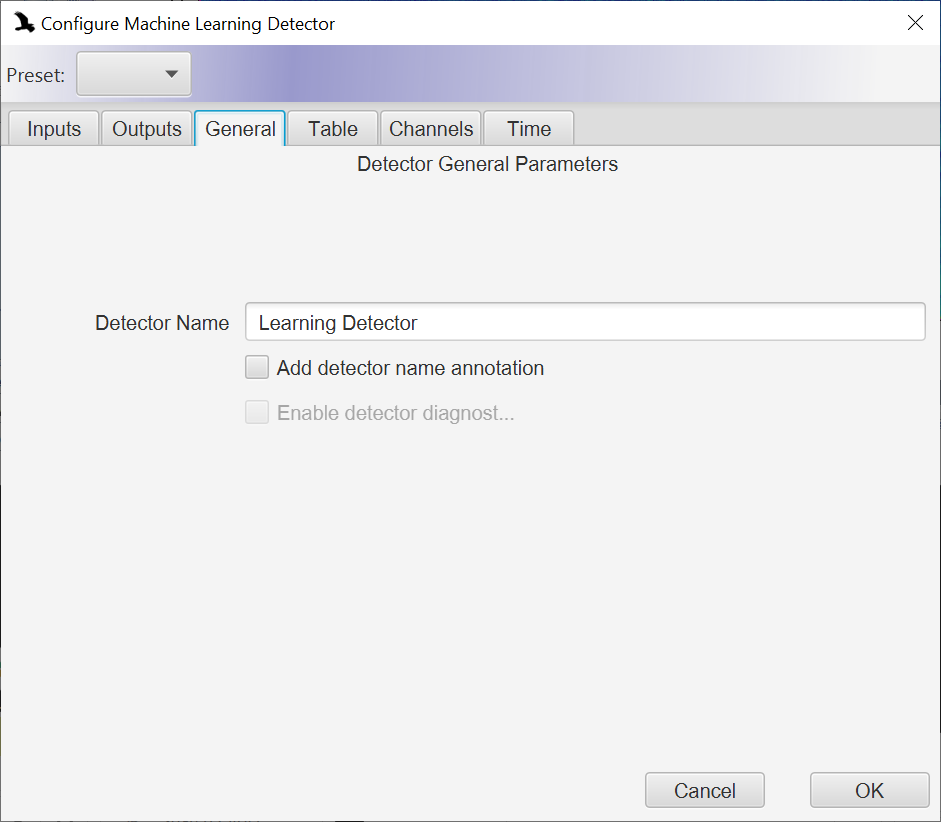
- General tab
- Add detector name annotation: If enabled will add a column to output selection table with the specified Detector Name in each selection.
- Enable detector diagnostics: (under construction)
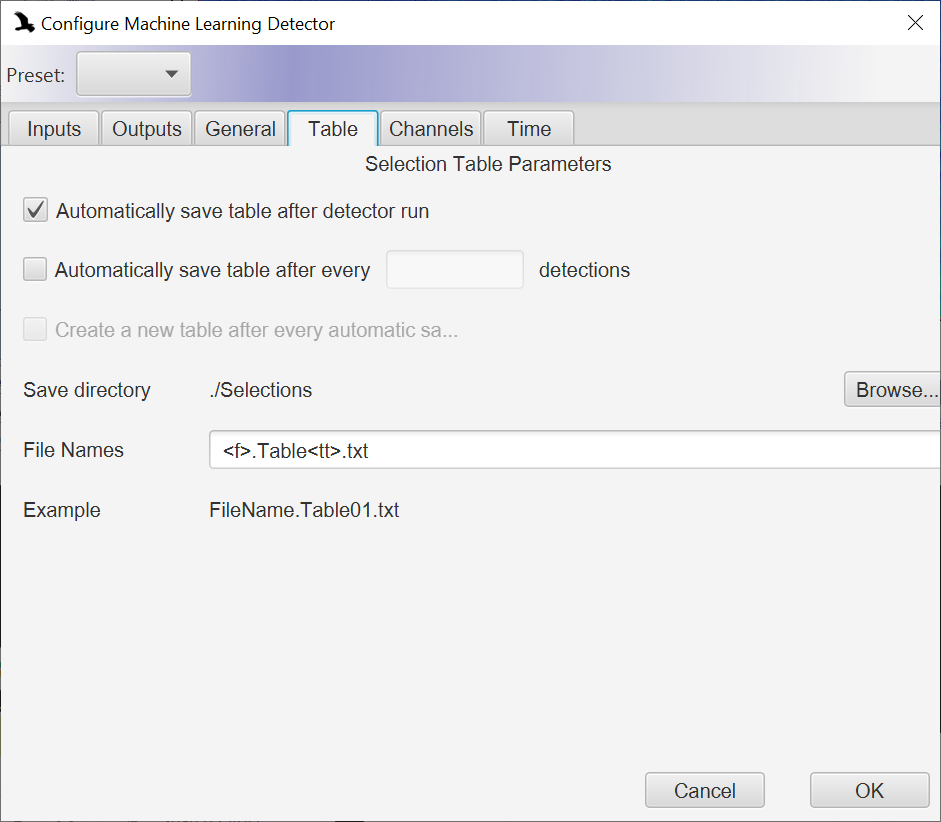
- Table tab
- Automatically save table after detection run: When enabled will cause the output selection table to be saved to a selection table file.
- Automatically save table after every <N> detections: When enabled will cause an output selection table to be saved after approximately each N detections. Warning: Do not set N to less than 100.
- Create a new table after every automatic save: When enabled will cause a new selection table file to be created after each N detections, approximately. This can prevent Raven from getting bogged down trying to hold too many selections when you are running the detection on a very long recording.
- Save Directory: Specifies the path to the directory where the output selection table or tables will be saved.
- File Names: Specifies that name of the output selection table or tables. “<f>” is substituted with the name of the sound file you are running the detection on. If your are running the detection on a sound window with multiple sound files, “<f>” is substituted with the name of the first sound file in the series.
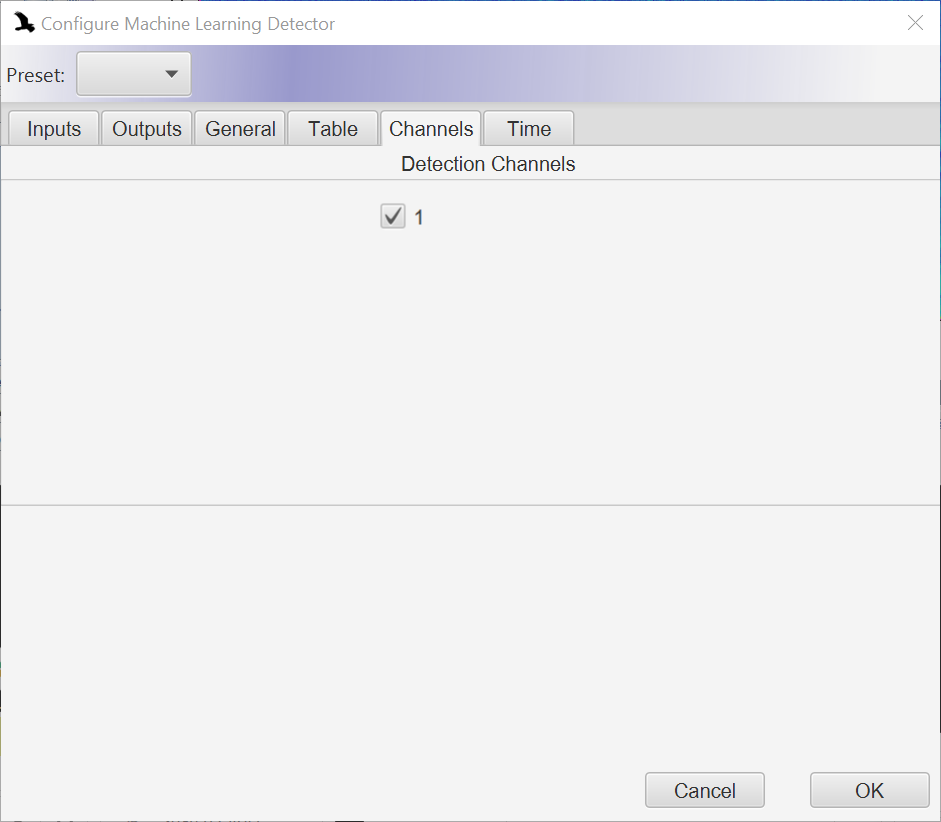
- Channels tab
- If you are running a detection on a sound file with more than one channel, you can select a subset of channels to run the detection on.
- If you are running a detection on a sound file with more than one channel, you can select a subset of channels to run the detection on.
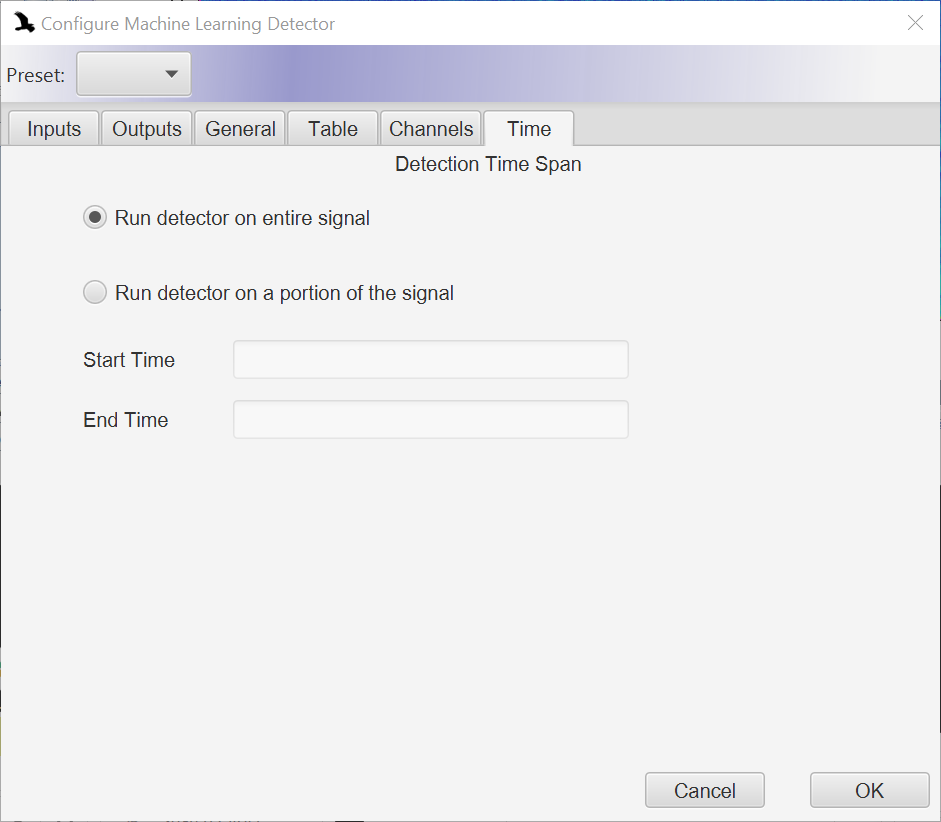
- Time tab
- Run detector on entire signal or Run detector on a portion of the signal
- Run detector on a portion of the signal
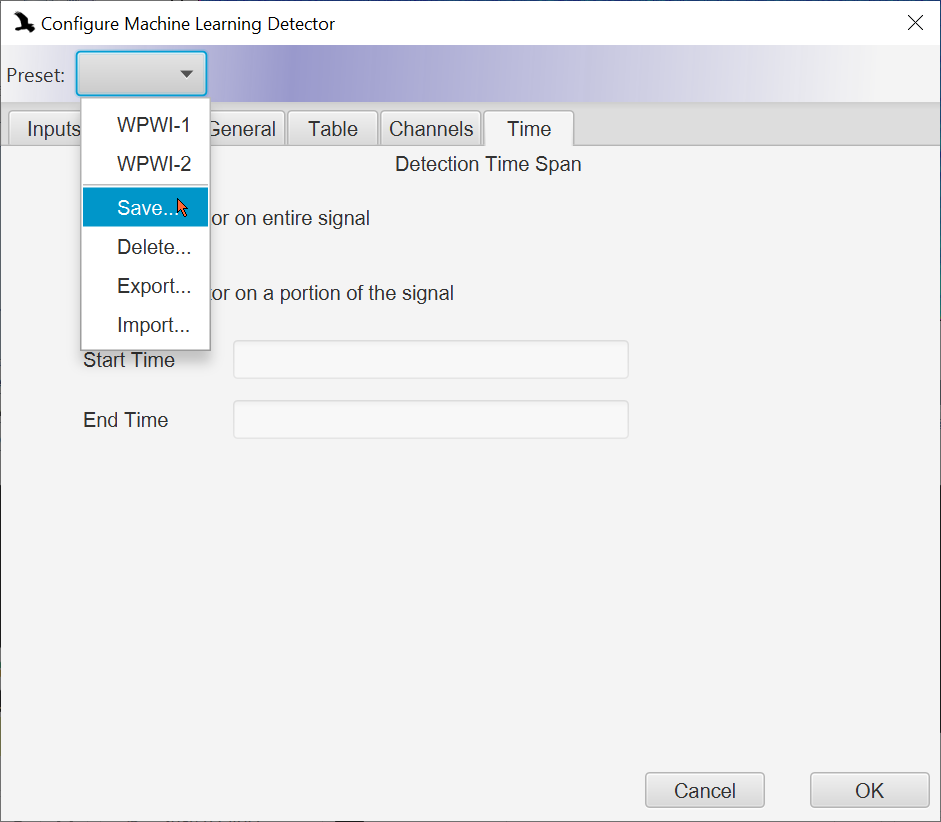
- Presets
- The “Presets” menu can be used to save your Learning Detector parameters for later retrieval. Once you have saved a preset it will appear in the Presets menu and can by selected later to retrieve your parameters.
- The “Presets” menu can be used to save your Learning Detector parameters for later retrieval. Once you have saved a preset it will appear in the Presets menu and can by selected later to retrieve your parameters.
- Cancel and OK buttons
- Cancel: Close the Configure Machine Learning Detector dialog box. The parameters you have entered will still be there when you open it again.
- OK: Run the Learning Detector.
Citations
BirdNET: A deep learning solution for avian diversity monitoring (Kahl et al, 2021)
Recommended Literature about Passive Acoustic Monitoring (PAM)