Selection Labels
INTRODUCTION
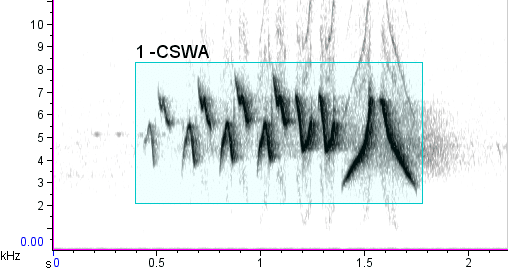
Placing labels with annotations and/or measurements on spectrograms and other sound views is often useful in research, instruction, and presentation contexts. In the following example the selection number and an annotation, the four-letter ABA code for Chestnut-side Warbler, are placed above the selection box in a Raven spectrogram view.
EXPLANATION
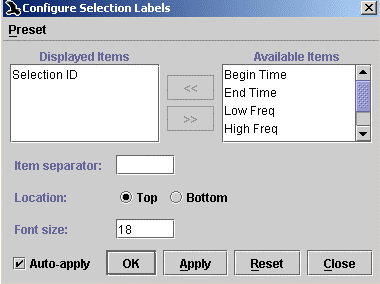
Selection labels can display selection IDs and/or any combination of measurements or annotations that are shown in the selection table. To choose which measurements are included in selection labels, as well as specifying font size and a string to use as a separator between items in selection labels, choose Configure Selection Labels from the View menu or any view’s contextual menu. To add a measurement or annotation to selection labels, highlight that item’s name in the list of Available Items, and click the left-pointing arrow button in the Configure Selection Labels dialog box. To remove an item from selection labels, highlight its name in the list of Displayed Items, and click the right-pointing arrow button. You can also enter a string of text that will appear as a separator between items in the selection labels; the default separator is a single space character.
You can specify colors for active and inactive selection labels via the color scheme editor (View > Color Scheme > Edit…), as described in “Editing color schemes” in Chapter 3 (page 71) of the Raven Pro User’s Manual.
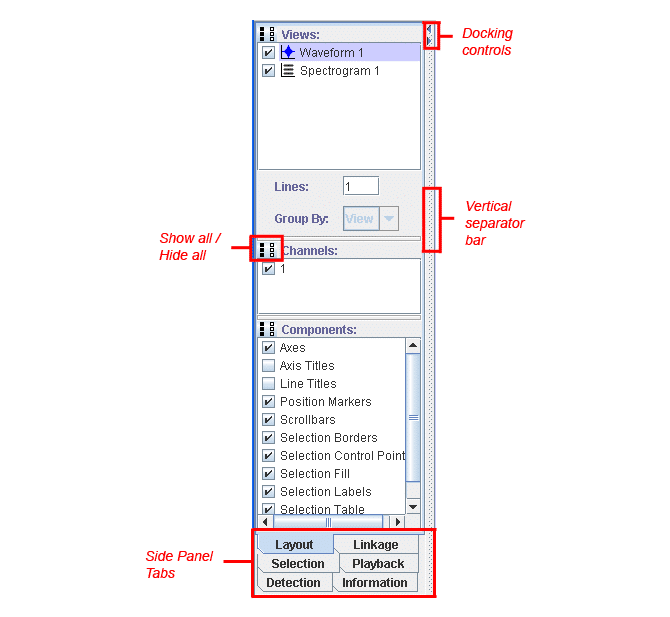
By default, Raven displays each selection’s ID number in selection labels in views. To toggle display of selection labels on and off, use the checkbox in the component list of the side panel’s Layout tab.